Securing Access to Azure Files with Enclave
Keywords: Azure, File Shares, SMB, Private Endpoints
This article provides guidance on how to set up Enclave to provide private connectivity to an Azure Files instance, meaning you can:
- Disable public access to your file shares, preventing phishing and credential stuffing attacks.
- Avoid manually specifying users' home/office IP addresses in the Azure Files allow-list.
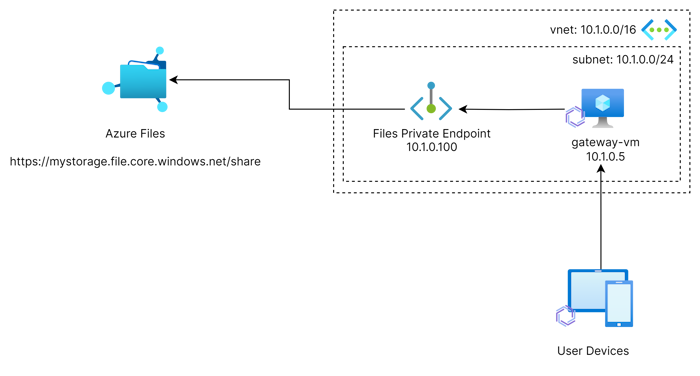
The fundamentals of the best-practice architecture here is based on our general guidance for private access to Azure Services, which is based upon the use of Azure Private Endpoints plus Enclave Gateway.
Note
In all Enclave reference architecture diagrams, the presence of the Enclave logo ( ![]() ) against a device indicates it is running the Enclave agent.
) against a device indicates it is running the Enclave agent.
For the purposes of this guide, we'll assume that you have:
- An Azure virtual network of
10.1.0.0/16. - A single subnet in that network of
10.1.0.0/24. - An Azure Files instance with a DNS name of
mystorage.file.core.windows.net.
Set up a Private Endpoint
The first step in deploying this solution is to set up a Private Endpoint in your virtual network that points to your Azure Files instance. There is already good information on doing this in the Azure documentation, but we'll outline the precise steps here.
Tip
The only significant deviation of these steps from the documentation provided by Azure is to set a Static IP for the private endpoint for you to reference later.
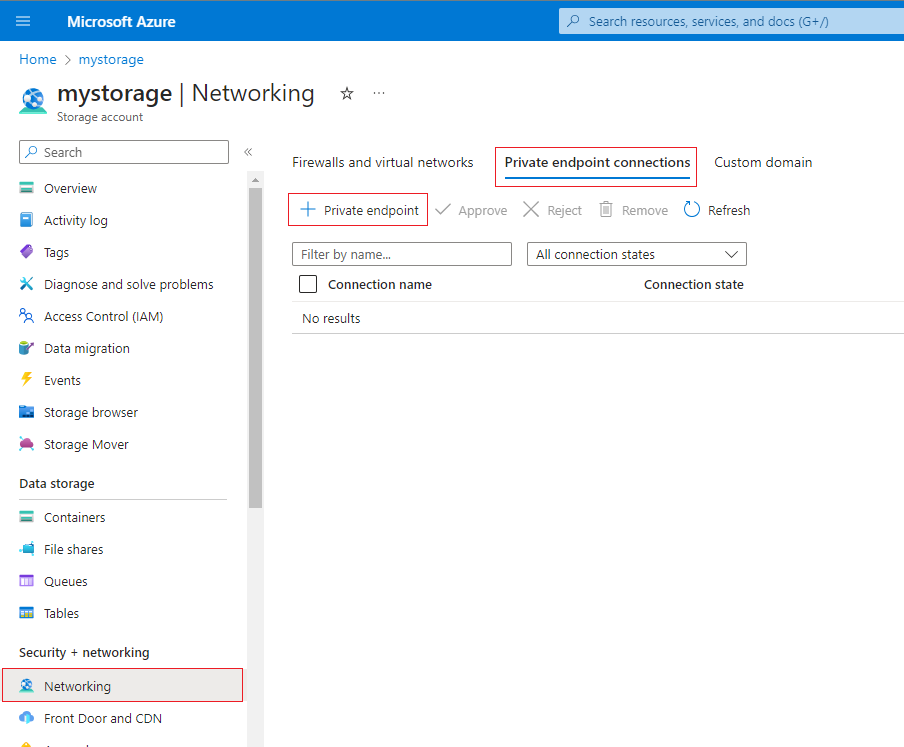
-
Visit the "Private endpoint connections" settings under the Networking options for your storage account.
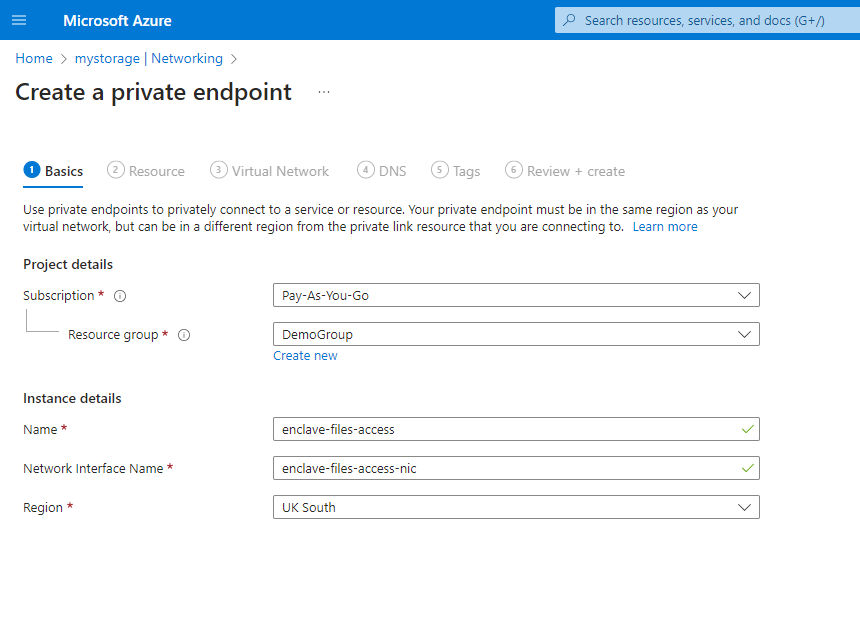
-
Create a new private endpoint and place it in the appropriate resource group and region.
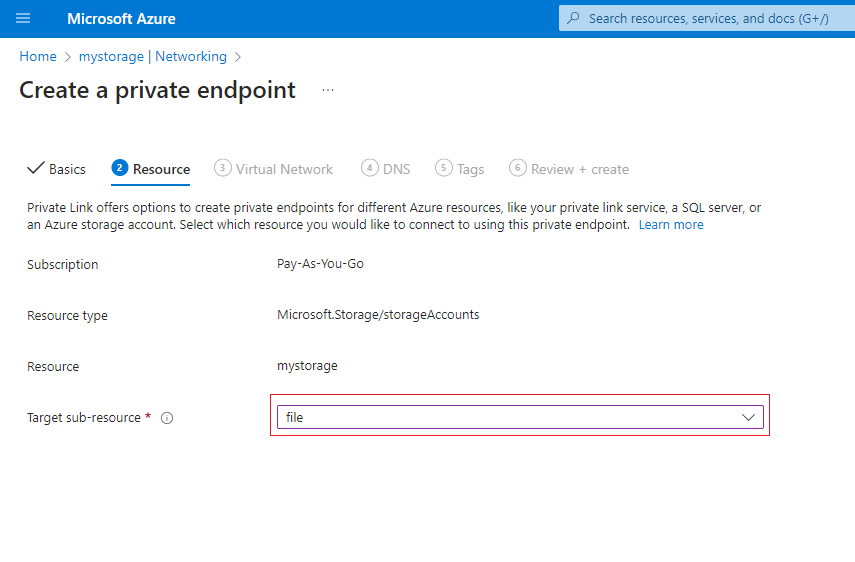
-
On the Resource tab, select the file sub-resource.
-
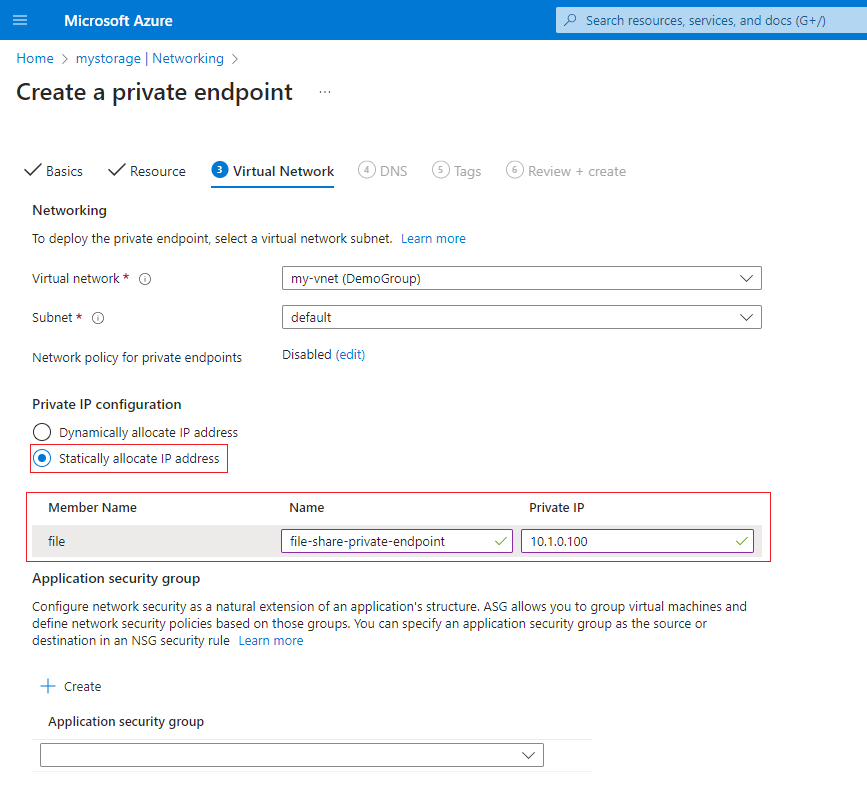
Under Virtual Network, choose which network the private endpoint should be accessible from. This must be the same the network in which your Enclave Gateway will reside.
Select Statically allocate IP address and choose an IP address for the private endpoint. For the purposes of this tutorial we've allocated 10.1.0.100 within our 10.1.0.0/24 subnet.
-
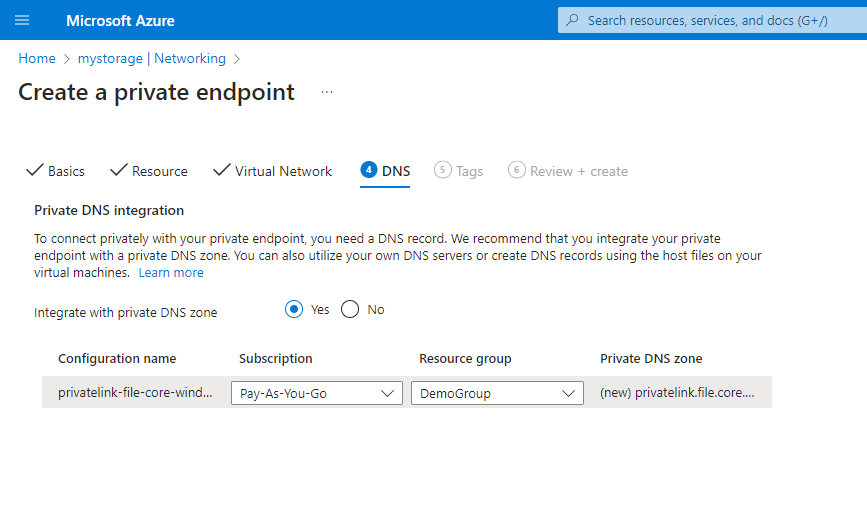
Next, under DNS, retain the defaults, ensuring that Integrate with private DNS zone is selected.
-
Finally, review the settings and create the private endpoint.
Set up a Gateway
In Azure, we recommend deploying an Enclave Gateway on a Linux VM. Depending on your throughput requirements, a good starting point for VM size would be a Standard_D2ls_v5.
For further information regarding the resource requirements of a gateway device, consult the section on gateway requirements in our docs.
-
Provision a Linux VM in your Azure vnet.
-
Install Enclave on your VM as per the normal Linux installation process, and enrol it into your Enclave organisation.
-
Within our portal, navigate to the detail view of the linux gateway VM, and configure it as a gateway, providing access to the subnet containing your private endpoint (in our case 10.1.0.0/24).
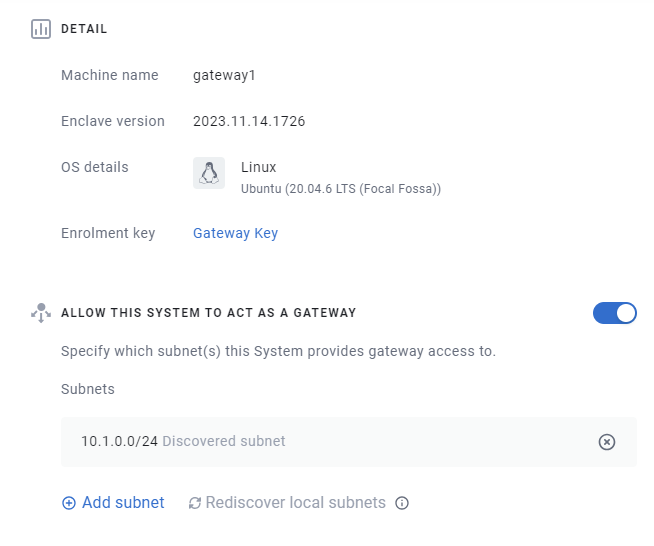
Note
If the gateway VM is not in the same subnet as your private endpoint, you will need to add the subnet manually.
Define your Policy
Once your gateway and private endpoint are set up, you can proceed to define your Enclave policy.
-
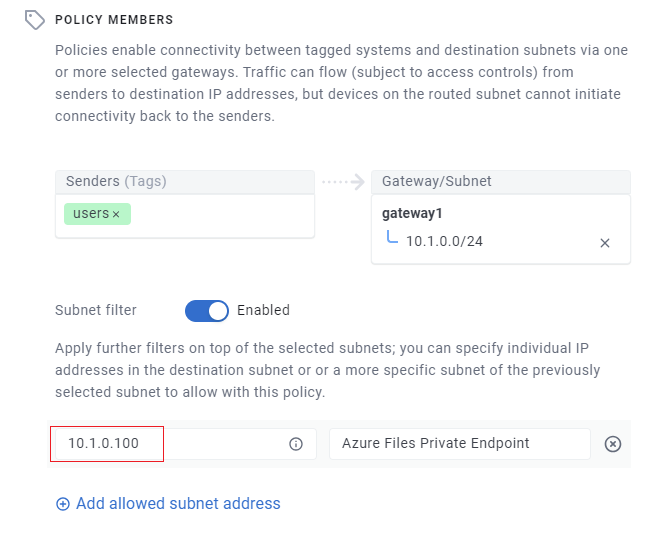
Define a Gateway Access Policy from a users tag to the gateway you've deployed.
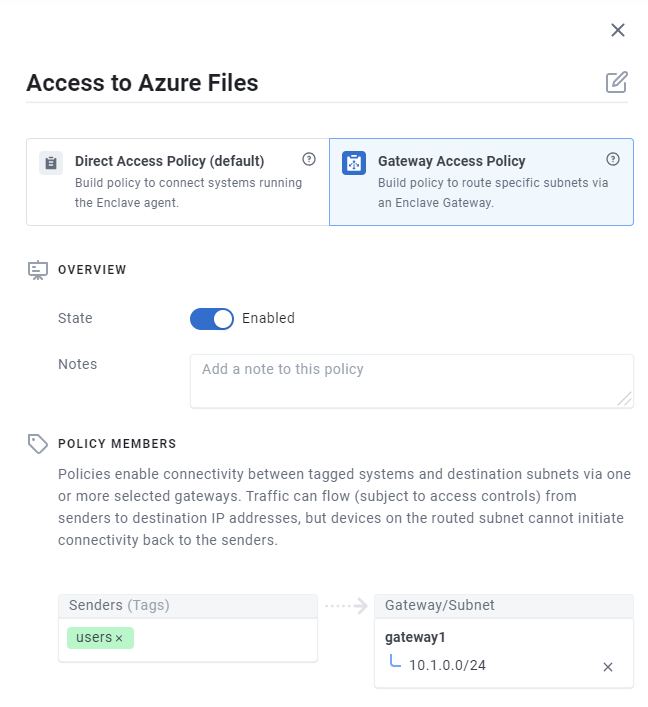
-
Configure a subnet filter on the policy to only allow access to your private endpoint within your subnet. In our example that's 10.1.0.100 in the 10.1.0.0/24 subnet:
-
Press save to create the policy.
Note
We've found that the performance of Windows explorer when applying just the SMB port of TCP 445 is not great, that's why we've left the allowed traffic to the private endpoint as All Traffic. This isn't a problem in this instance, because Azure Files is a managed service, and so the attack surface is minimal.
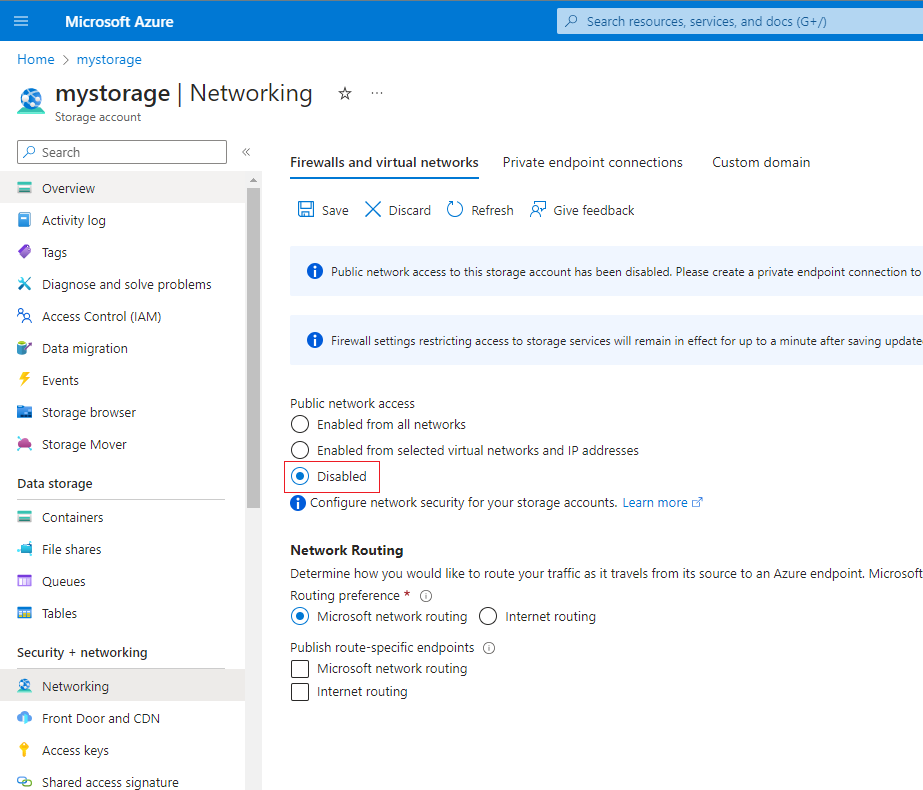
Remove Public Access to your Storage Account
Finally, you can remove public access to your storage account, preventing any access to your file shares from the internet and ensuring that all access is mediated by Enclave.
Wrapping Up
The nice thing about this approach is that from an end-user's perspective, nothing will change. They will still be able to access the file share as they did before, but now their access is via Enclave.
The DNS name of the file share will remain the same (in our case mystorage.file.core.windows.net), and the authentication mechanism will remain the same. The only difference is that the file share will no longer be accessible from the internet.