N-Central RMM Integration
Enclave provides an integration with N-Central that lets you easily deploy and update Enclave across your devices. This guide will walk you through the process of deploying this integration.
A pre-defined Automation Policy is provided that can be run on-demand or as a scheduled task to:
- Silently roll out Enclave to all your devices.
- Automatically update Enclave aligned with your other update policies.
Prerequisites
You will need an N-Central account with administrator access to deploy the Enclave integration.
Note
Currently the integration only supports deploying to Windows devices.
Installing the Integration
-
Download the Enclave Integration .AMP file to your local machine.
-
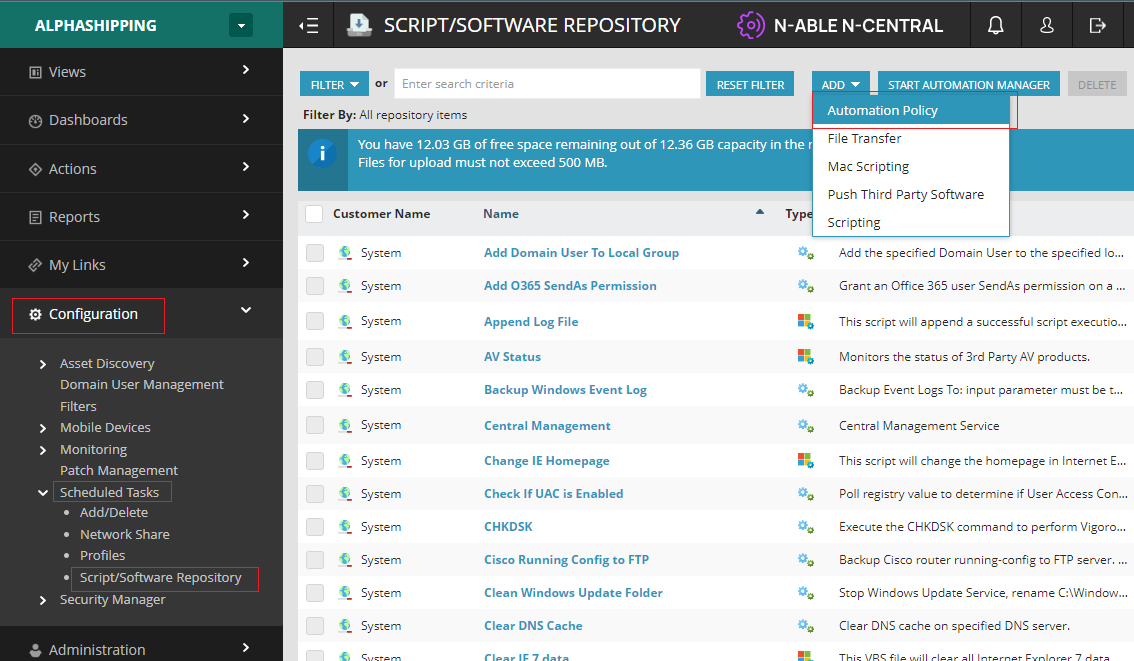
Navigate to the Script/Software Repository within your N-Central portal. Click Add, then Automation Policy.
-
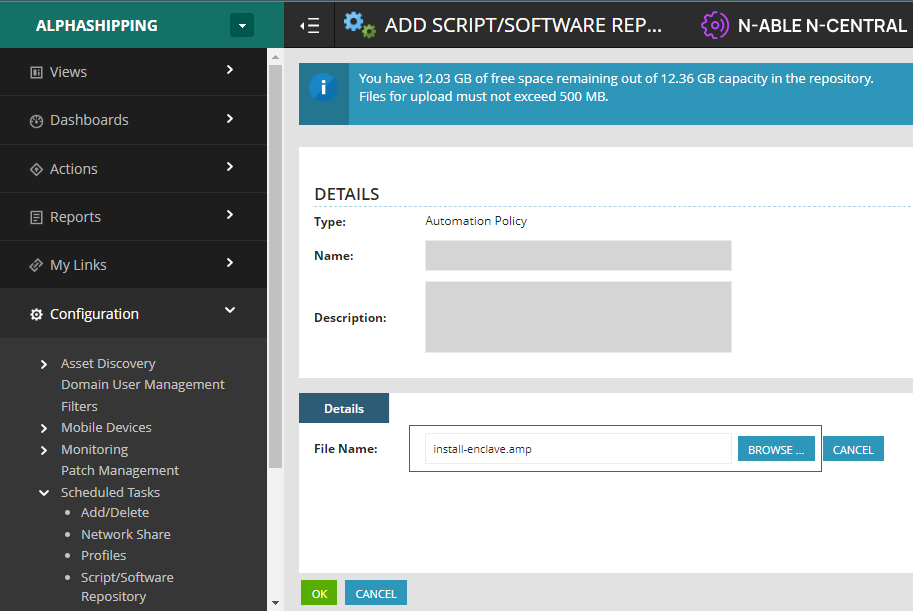
On the next page, select Browse, and choose the file you downloaded in step 1. Press OK to upload the file.
-
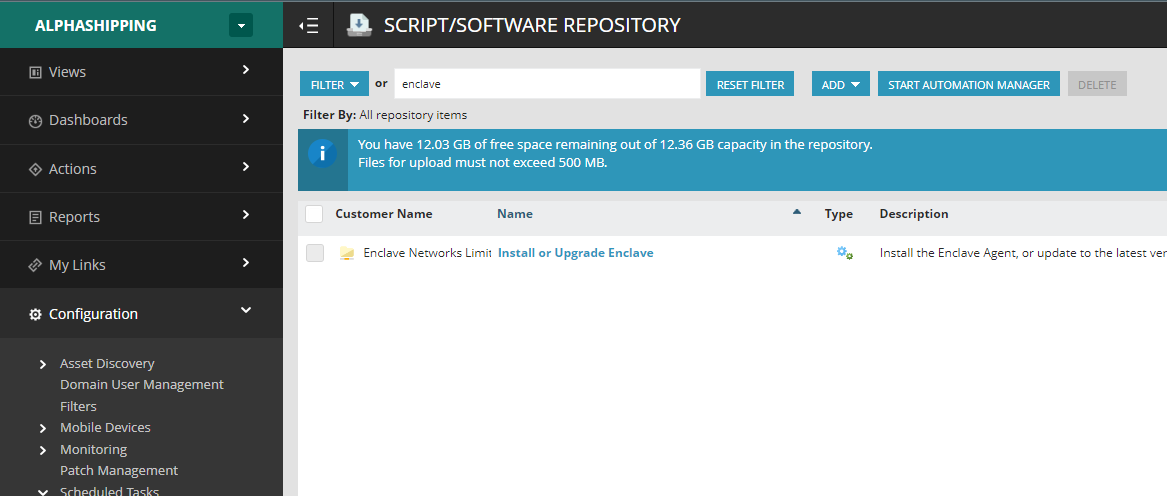
You should now see the Install or Upgrade Enclave automation policy in your list of automation policies.
Defining Enrolment Keys as a Custom Property (optional)
If you wish, you can define your Enclave enrolment keys as a custom property per-customer, allowing you to reference the enrolment key in the scheduled task when it runs.
-
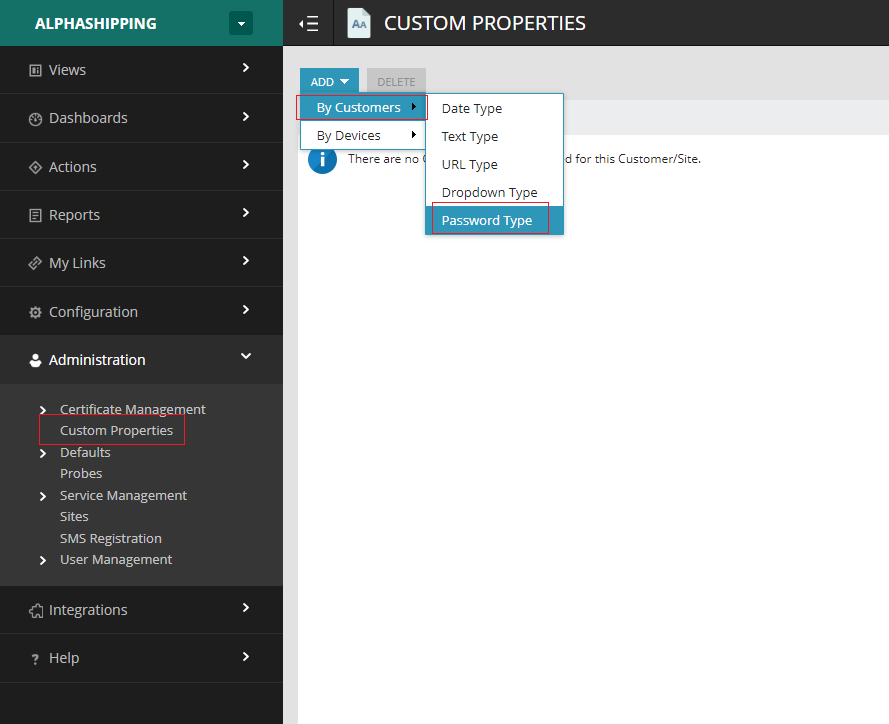
Navigate to the Administration section of your N-Central portal, at the Customer Level, and select Custom Properties. Then select Add -> By Customers -> Password Type.
Warning
Do not assign an Enrolment Key at the N-Central Organisation level, as that will lead to all your devices being enrolled into the same Enclave organisation by default, which you do not want.
-
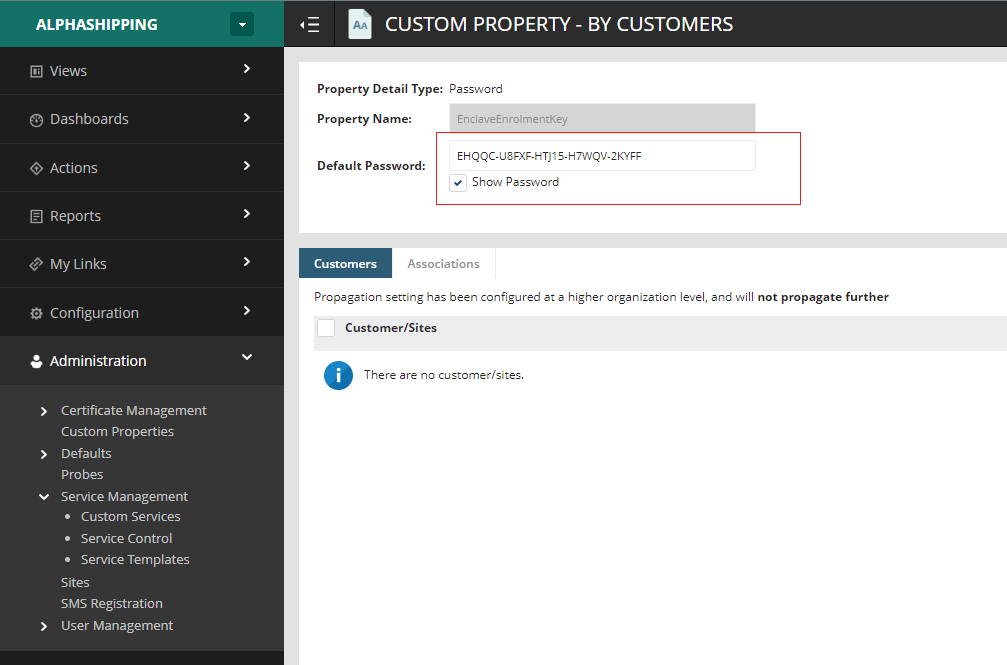
Call your new custom property EnclaveEnrolmentKey, and provide the Enclave enrolment key you created for your customer in our portal.
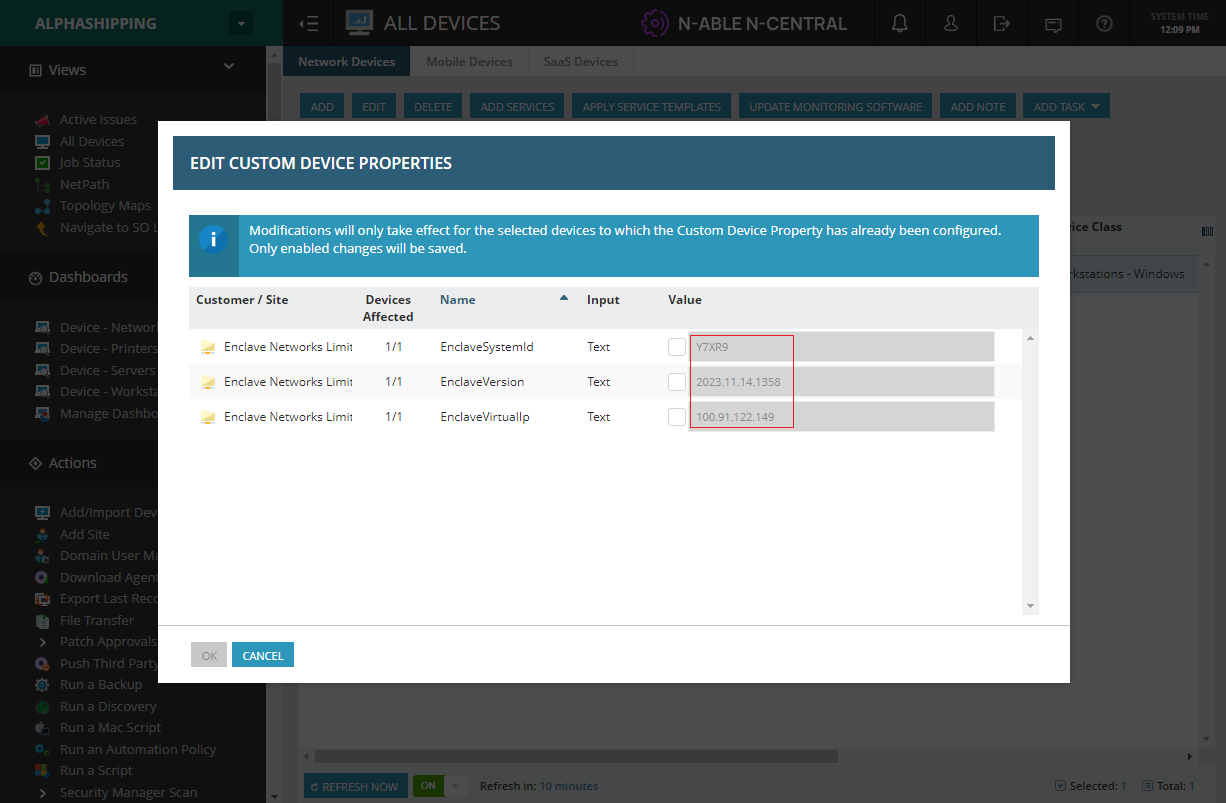
Capturing Enclave Custom Properties for each device (optional)
When deployment/upgrade completes, Enclave can update custom properties for each enrolled device so you can relate the Enclave system ID and virtual IP address to the device in N-Central.
-
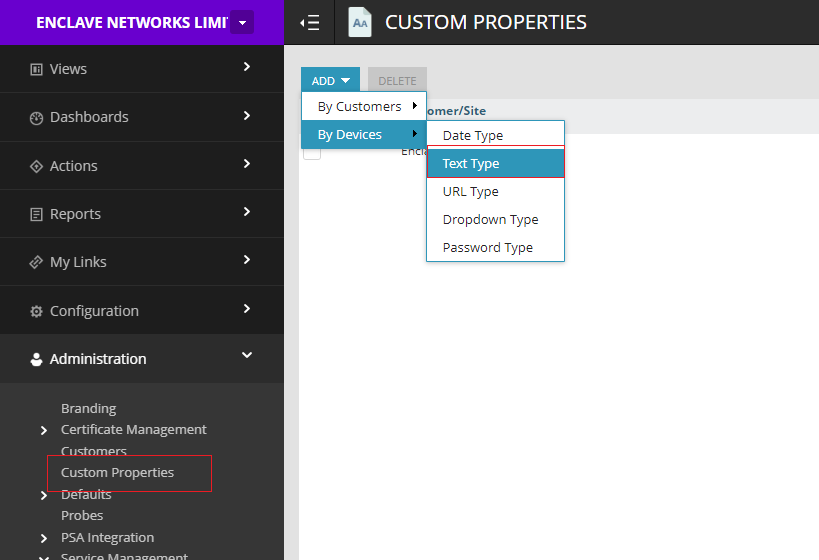
Navigate to the Administration section of your N-Central portal, at the Organisation Level, and select Custom Properties. Then select Add -> By Devices -> Text Type.
-
Define three properties with the following names:
- EnclaveVersion; will contain the currently installed version of Enclave.
- EnclaveSystemId; will contain the Enclave system ID for the device.
- EnclaveVirtualIp; will contain the Enclave virtual IP address for the device.
Assign your Operating System and Device Classes as appropriate for the devices that will have Enclave deployed.
Using the Automation Policy
When you're ready to roll out Enclave, you can create a new N-Central Scheduled Task to run the Enclave Automation Policy.
-
Navigate to the Configuration section of the N-Central menu, and under Scheduled Tasks select Add/Delete. Then click Add -> Automation Policy.

-
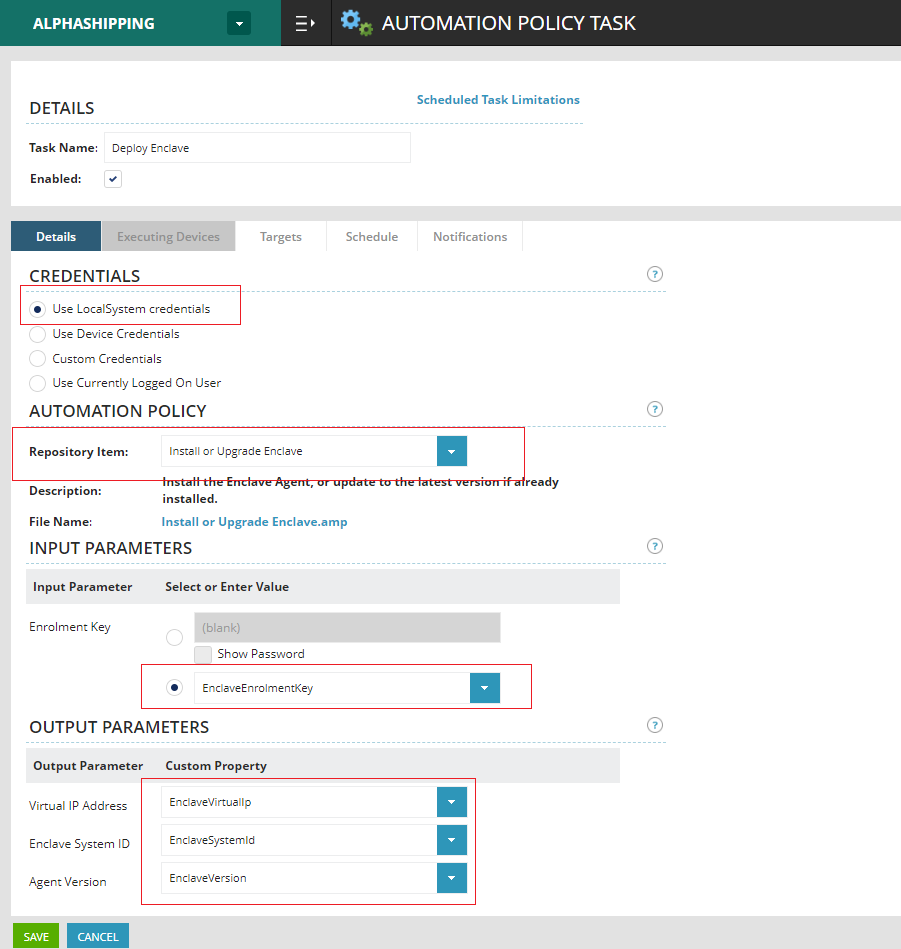
Under the Details tab:
- Select Use LocalSystem credentials.
- Select Install or Upgrade Enclave under Repository Item.
- Provide an Enclave enrolment key, either by entering the enrolment key directly, or by selecting the EnclaveEnrolmentKey custom property you optionally created earlier.
- Specify the three device properties to save the Enclave version, system ID and virtual IP address to, if you created them earlier.
-
Under the Targets tab, select the devices you wish to deploy Enclave to.
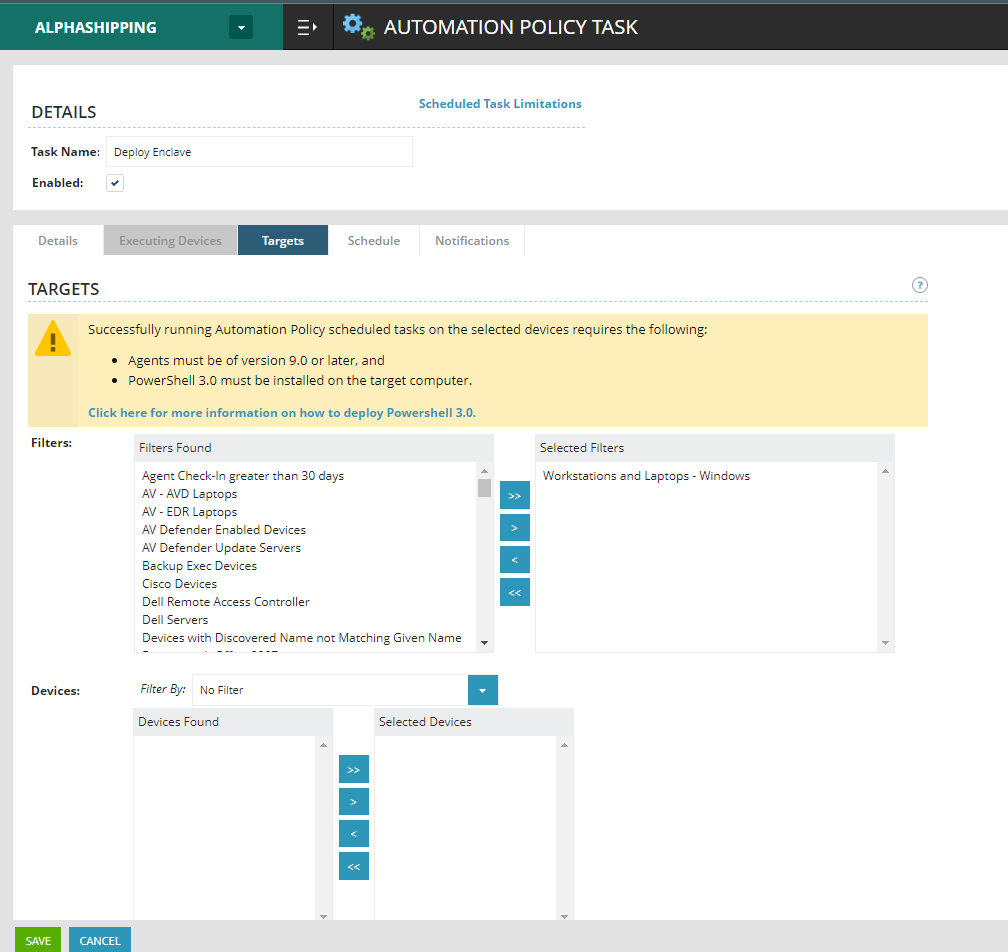
Note
As you may notice from the screenshot, this policy requires Powershell 3.0 (which should already be available on our supported platforms).
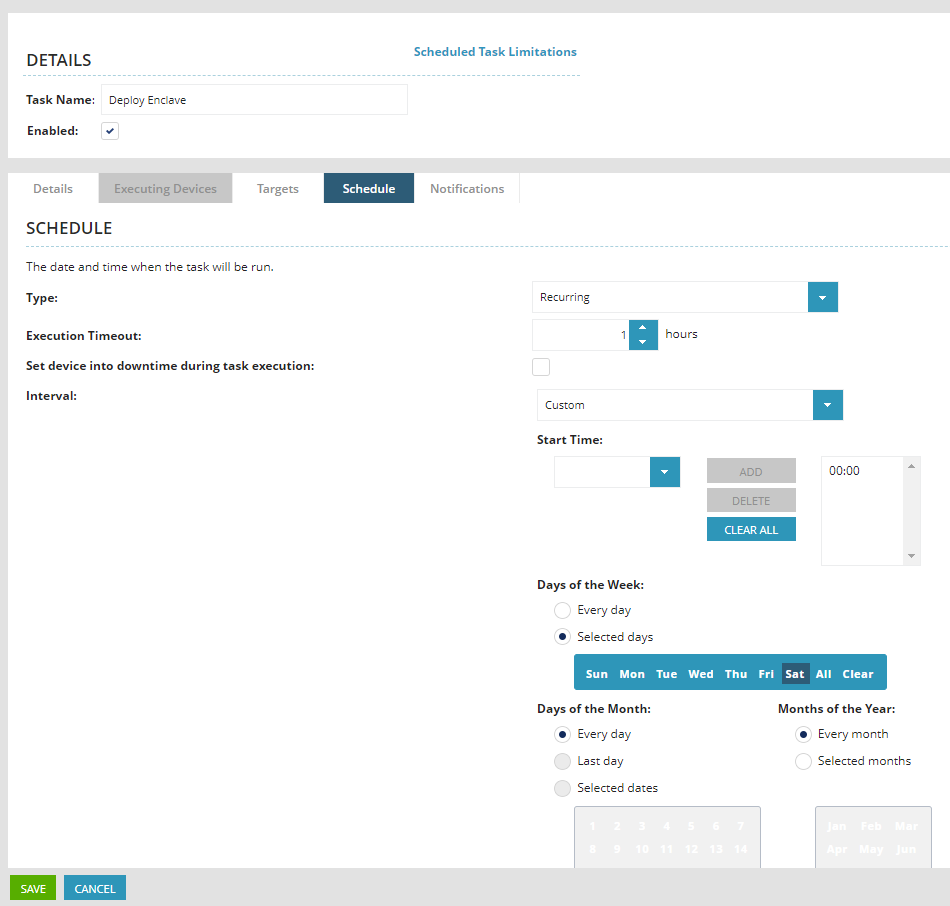
-
Under the Schedule tab, select Now to begin roll-out immediately, or select the schedule you wish to run the task on. We recommend running the task once a week, or possibly once a month, to ensure Enclave is updated when we release a new version. You may wish to select a schedule that aligns best to your existing patch schedule.
When initially deploying Enclave, you can set the task to run Now, then change the schedule to an appropriate time once the initial deployment is complete.
Important
When Enclave is updated, the system will be disconnected from the Enclave network for a short period of time. This will result in any active connections being dropped. We recommend scheduling the task for a time when this will have the least impact on your users.
-
When you're ready to deploy Enclave, press Save to create the scheduled task.
Once the scheduled task runs, you can visit an enrolled device within your N-Central portal, and you should see the Enclave version, system ID and virtual IP address populated in the custom properties you created earlier (if you chose to do so).