User Authentication with Okta
Our Okta authentication authority lets you log users in at the agent against your existing Okta tenant. With this you can:
- Apply Okta Authentication Policies to user logins.
- Use any MFA mechanism supported by Okta for authentication
Create an Okta Application
To get started, you need to set up a few things in your Okta tenant. Log in to your Okta tenant with an administrator account, then visit the "Applications" page in the menu on the left.
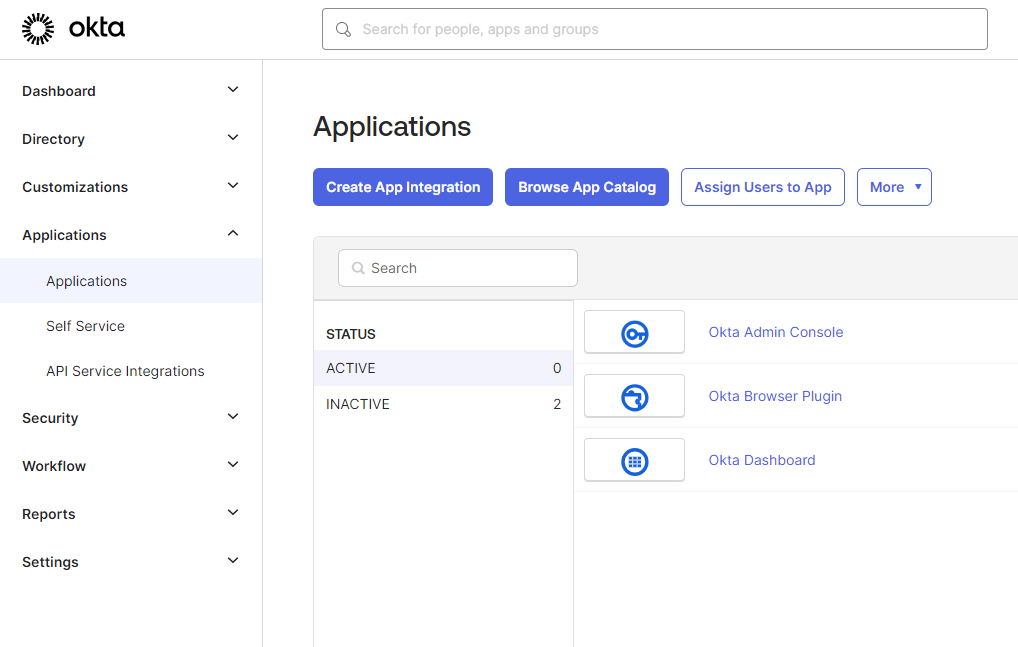
Once there, click "Create App Integration" to add an app. Then select OIDC - OpenID Connect as the sign-in method and select Native as the application type.
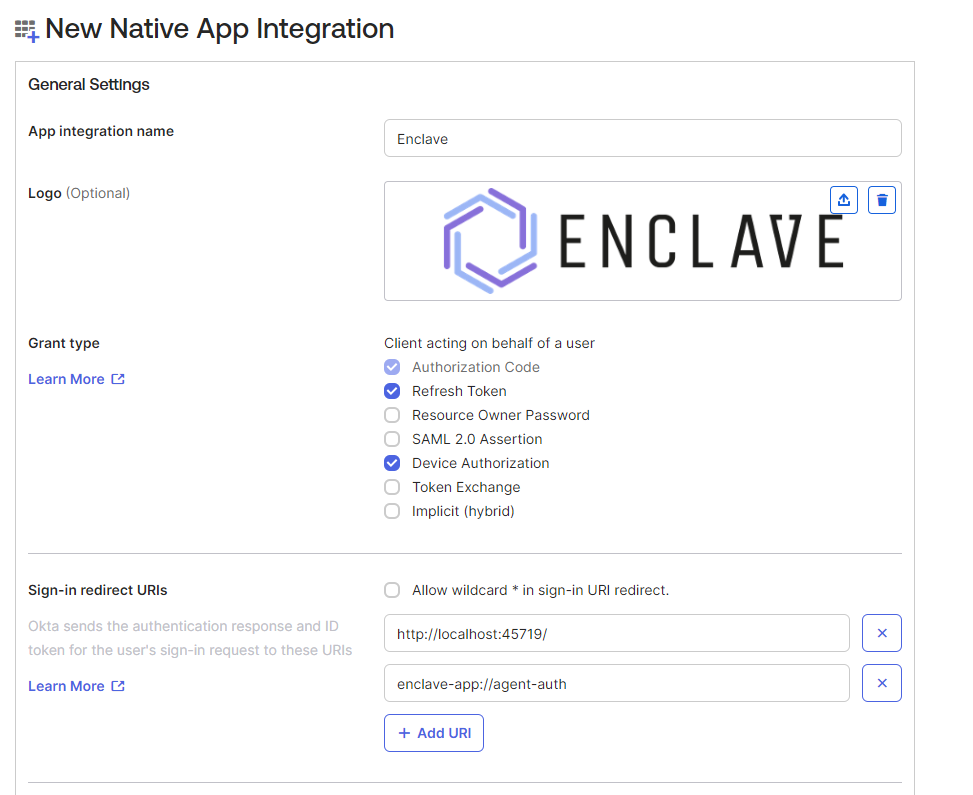
When the subsequent page is displayed, specify the following options:
| App Integration Name | Set to Enclave |
| Logo (optional) | If you wish, you can use this image file as a logo |
| Grant Type | Enable Refresh Token and Device Authorization grant types |
| Sign-in redirect URIs | Specify two URIs: - http://localhost:45719/ - enclave-app://agent-auth |
| Controlled Access | You may wish to set this to Allow everyone in your organization to access or assign groups if you're ready to do so. |
Your page should look something like this:
Press Save when ready to create your Application.
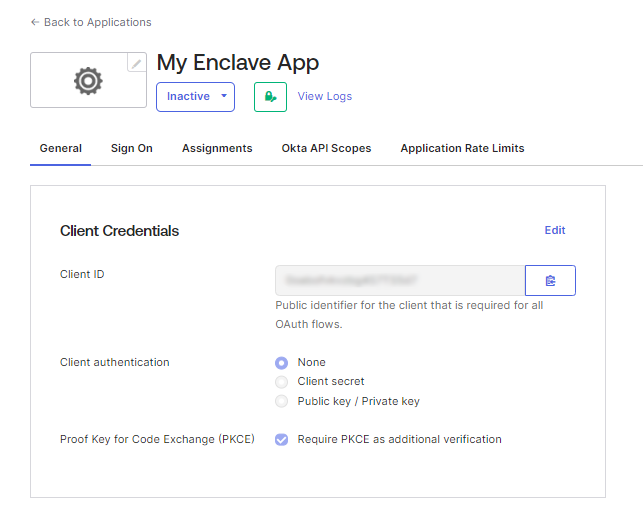
Once the application is created, you should see your Client ID, which you will need in a few moments when creating the Enclave Trust Requirement:
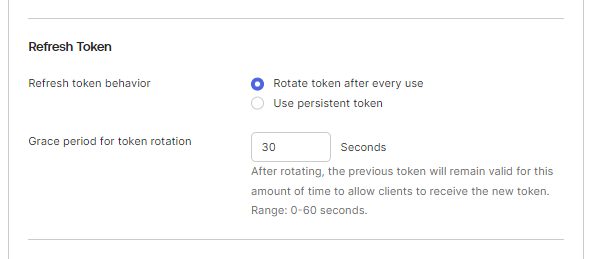
We also recommend at this stage editing the application General Settings and changing Refresh token behavior to Rotate token after every use. This reduces the risk of refresh tokens being exfiltrated from agents.
Add Authorization Server
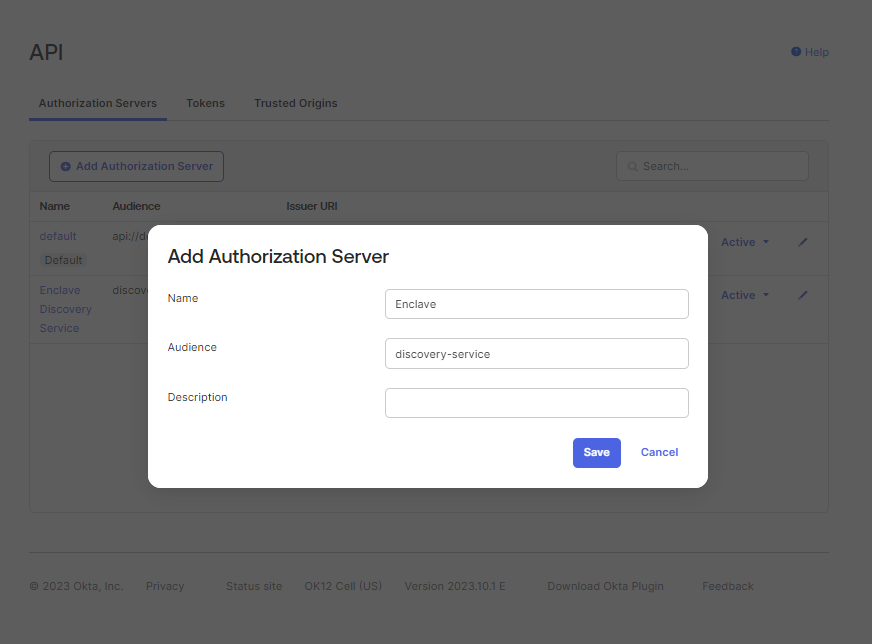
Next, we need to add an Okta Authorization Server, to give us an Authority URI and let us customise the tokens sent to Enclave.
In the Okta menu, select Security -> API, then on the resulting screen, click Add Authorization Server. Call the new Authorization Server Enclave and specify an audience of discovery-service.
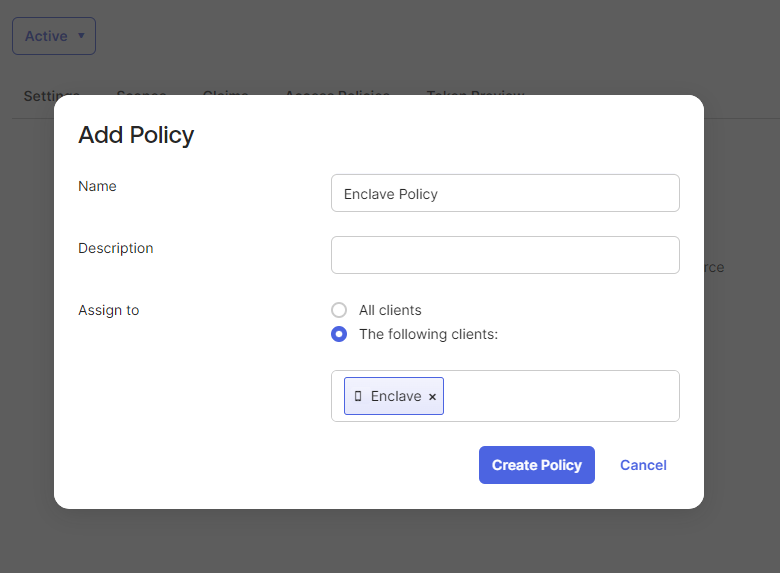
Next, select the Access Policies tab and click Add Policy. Give the policy a name, and assign your new Enclave client to the policy.
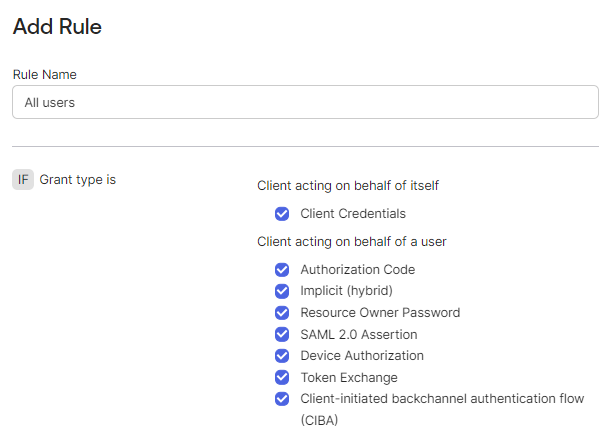
Then, add a Policy Rule that applies to all users, and leave all the defaults in place.
Tip
This page is where you can customise the Access Token lifetime to change how frequently Enclave verifies access against Okta.
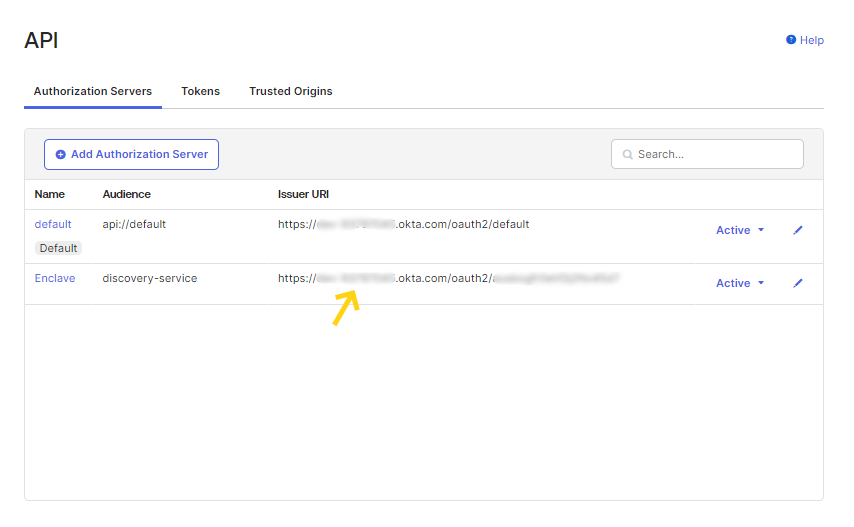
Once you have created and configured your new Authorization Server, copy the Issuer URI, which can be found back on the Authorization Servers listing:
Creating your Trust Requirement
Now we have all the Okta configuration set up, we can create our Enclave Trust Requirement.
When defining a new User Authentication Trust Requirement in the Enclave Portal, select Okta from the Authority dropdown, and populate the fields with:
- The Okta App Client ID
- The Authorization Server Issuer URI
- The audience value ('discovery-service', if you followed this guide)
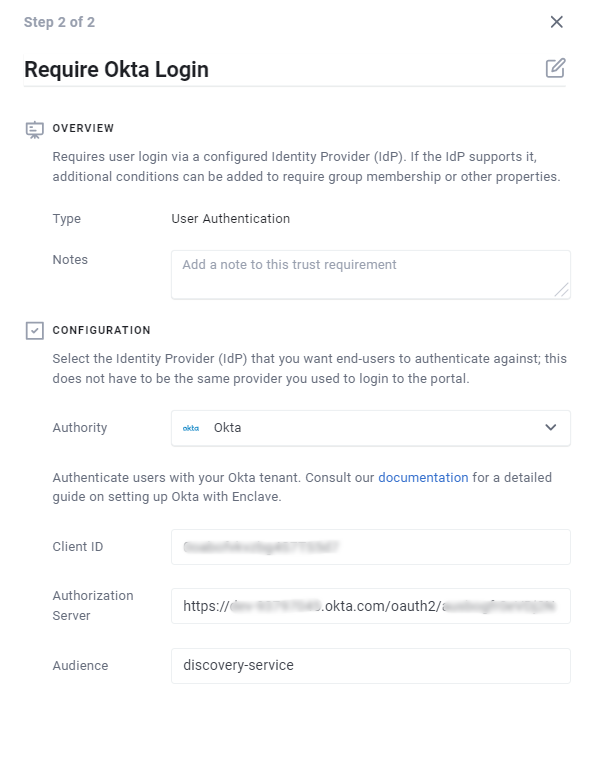
Once you press Save you can start using your Okta Trust Requirement in an Enclave Policy. Your users will then be prompted to login and will be sent to your Okta tenant for authentication.