Windows
Installation
This guide applies to Windows 10, 11 and Windows Server 2012, 2016, 2019, 2022 and 2025 (all editions). Packages are available for x64, arm64 and x86 architectures.
-
Download and run the latest Windows installer
Package checksum (loading ...)
----------------------------------------------------------------Package version
xxxx.xx.xx.xxxx (Direct Download)
-
Run the installer. Administrator privileges are required, but the installer will prompt for privilege elevation if necessary.
-
You will need to provide a valid Enrolment Key from your Portal account to complete installation.
-
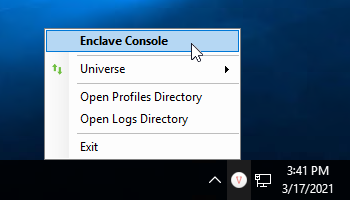
Once installed, Enclave will start and add a new icon to your system tray. If the Enclave desktop app icon is not visible, click the up arrow to find it in the hidden system tray overflow area.
-
Right click on the desktop app icon when you need to open Enclave.
-
Depending on the type of enrolment key you used to enrol your new system, it might be held waiting for an Administrator to provide enrolment approval in your account Portal. Log in to authorise the enrolment of your new system if you need to and configure additional options like DNS.
You're all set! You've successfully enrolled a new system to your Enclave account.
Starting and stopping
The Windows installer creates a lightweight supervisor service (named Enclave in the Services MMC snap-in) which automatically runs at system start and is responsible for starting the Enclave fabric. The supervisor service exists to start, stop and restart Enclave fabric in the background as child processes.
The supervisor service responds to the Enclave CLI verbs start and stop to control the Fabric.
Updating
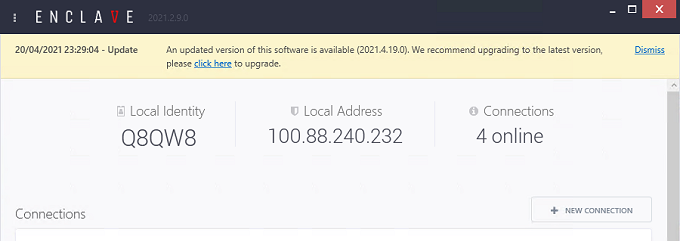
The Windows desktop app will prompt users when an updated version of Enclave is available. Following the click here to upgrade link in the yellow bar will terminate any Enclave connections temporarily while the setup installs the latest version.
Enclave should be upgraded in-place and will automatically and re-establish connectivity to peers following an update. Updating Enclave to a new version should not interrupt connectivity for more than 1 minute in total, in most cases an upgrade takes less than 30 seconds before connectivity is restored.
Uninstalling
Enclave can be removed from a system using the Windows Control Panel. Open either Programs and Features or Apps and Features. Select Enclave to remove / uninstall. During uninstallation Enclave will ask if you want to Remove network fabric configuration and private keys? Answering yes will empty the following directory:
C:\Program Files\Enclave Networks\Enclave\Agent\profiles\
Users should remove configuration and private keys when uninstalling if they are not planning to use Enclave again on a that particular system, or want to forcibly deregister.
Warning
Enclave does not backup a system's private keys. Lost or deleted private keys are not recoverable. If a system's configuration and private keys are lost, to use that system with Enclave again it must be re-enrolled.
Unattended
Install
Perform a silent installation of Enclave without a UI by using the unattended installer. The unattended installer is optimised for deployment via Group Policy, Configuration Manager and other automated tooling. We recommend using unattended installers for bulk distribution and silent installation.
For most unattended installation scenarios, you should use our PowerShell script.
We provide a PowerShell script that can be invoked by your RMM platform to deploy Enclave. We recommend administrators configure their RMM tooling to run the installation script with the following PowerShell command. Be sure to replace $YourEnrolmentKey with the appropriate XXXXX-XXXXX-XXXXX-XXXXX-XXXXX enrolment key. We do NOT recommend storing enrolment keys in plain text, they are considered secret values. Instead prefer storing enrolment keys using the secrets management capability of your RMM platform, substituting the secret into $YourEnrolmentKey as required at runtime.
Note
This script should be run within an administrative context, or users may see a UAC prompt while it executes.
iex "& { $(iwr -useb https://install.enclave.io/setup-unattended.ps1) } -EnrolmentKey $YourEnrolmentKey"
A major benefit of invoking the PowerShell script is that it will automatically keep Enclave up to date each time it's executed, not just deploy it and it is recommended that administrators configure their RMM platforms to run this script regularly. The script will:
- Install or update Enclave as needed
- Detect the system architecture automatically
- Install any necessary dependencies
- Automatically enrols the system into your Enclave tenant based on Enrolment Key
- Sanitise installer logs to remove enrolment keys
- Output the system ID, virtual IP and installed version (useful for capturing as RMM properties)
You may also download the full script directly for your RMM tooling as required. We do not recommend this approach as it doesn't guarantee your platform is using the latest version of the script, but if you need to do this, the full PowerShell script is available to download and inspect at this URL: https://install.enclave.io/setup-unattended.ps1.
The script outputs the following properties:
| Property | Description | Example value |
|---|---|---|
| NewVersion | The Enclave version after the script has finished. | 2023.11.14.1358 |
| OldVersion | The Enclave version before the script ran (empty if first-time install). | |
| VirtualIp | The Enclave IP address of the system. | 100.114.230.173 |
| SystemId | The unique Enclave System ID, can be used to reference the system in the portal. | 8L2ZD |
-
Download and run the latest Windows unattended installer.
Package checksum (loading ...)
----------------------------------------------------------------Package version
xxxx.xx.xx.xxxx (Direct Download)
-
Distribute as needed via Group Policy, Configuration Manager, or any other deployment method that allows installers to run with elevated permissions on the machine.
To run the installer in silent mode (with no UI), you pass the
-qcommand line argument, like so:./enclave-setup-unattended-x64-<version>.exe -qYou can also provide the Enclave enrolment key to the unattended installer to automatically enrol Enclave during installation, so no end-user interaction is required to get set up:
./enclave-setup-unattended-x64-<version>.exe -q ENROLMENT_KEY=XXXXX-XXXXX-XXXXX-XXXXX-XXXXXProviding an invalid enrolment key will cause the installation to fail (and roll back).
Note
If your tooling provides an enrolment key to the installer, at the time of installation the target system will require an Internet connection to perform the enrolment.
If you need to deploy Enclave to a system without an Internet connection, use the unattended installer without the
ENROLMENT_KEYproperty, then use theenclave enrolCLI command to enrol the system when an Internet connection becomes available.
-
Download and run the latest Windows unattended installer.
Package checksum (loading ...)
----------------------------------------------------------------Package version
xxxx.xx.xx.xxxx (Direct Download)
-
Distribute as needed via Group Policy, Configuration Manager, or any other deployment method that allows installers to run with elevated permissions on the machine.
To run the installer in silent mode (with no UI), you pass the
-qcommand line argument, like so:./enclave-setup-unattended-x86-<version>.exe -qYou can also provide the Enclave enrolment key to the unattended installer to automatically enrol Enclave during installation, so no end-user interaction is required to get set up:
./enclave-setup-unattended-x86-<version>.exe -q ENROLMENT_KEY=XXXXX-XXXXX-XXXXX-XXXXX-XXXXXProviding an invalid enrolment key will cause the installation to fail (and roll back).
Note
If your tooling provides an enrolment key to the installer, at the time of installation the target system will require an Internet connection to perform the enrolment.
If you need to deploy Enclave to a system without an Internet connection, use the unattended installer without the
ENROLMENT_KEYproperty, then use theenclave enrolCLI command to enrol the system when an Internet connection becomes available.
Use this MSI package if your tooling requires, or if you need to embed the Enclave installer into an existing package.
Note
The MSI package does not bundle the Visual C++ Redistributable, so you will need to ensure that your packaging and deployment steps include the VC++ redistributable library as well; See this Microsoft document for further details, and links to download the redistributable.
-
Download the latest Windows MSI installer.
Package checksum (loading ...)
----------------------------------------------------------------Package version
xxxx.xx.xx.xxxx (Direct Download)
-
Install the MSI using
msiexec:msiexec /i enclave-setup-unattended-x64-<version>.msi /quiet ENROLMENT_KEY=XXXXX-XXXXX-XXXXX-XXXXX-XXXXXNote
If your tooling provides an enrolment key to the installer, at the time of installation the target system will require an Internet connection to perform the enrolment.
If you need to deploy Enclave to a system without an Internet connection, use the unattended installer without the
ENROLMENT_KEYproperty, then use theenclave enrolCLI command to enrol the system when an Internet connection becomes available.
Use this MSI package if your tooling requires, or if you need to embed the Enclave installer into an existing package.
Note
The MSI package does not bundle the Visual C++ Redistributable, so you will need to ensure that your packaging and deployment steps include the VC++ redistributable library as well; See this Microsoft document for further details, and links to download the redistributable.
-
Download the latest Windows MSI installer.
Package checksum (loading ...)
----------------------------------------------------------------Package version
xxxx.xx.xx.xxxx (Direct Download)
-
Install the MSI using
msiexec:msiexec /i enclave-setup-unattended-x86-<version>.msi /quiet ENROLMENT_KEY=XXXXX-XXXXX-XXXXX-XXXXX-XXXXXNote
If your tooling provides an enrolment key to the installer, at the time of installation the target system will require an Internet connection to perform the enrolment.
If you need to deploy Enclave to a system without an Internet connection, use the unattended installer without the
ENROLMENT_KEYproperty, then use theenclave enrolCLI command to enrol the system when an Internet connection becomes available.
Use this MSI package if your tooling requires, or if you need to embed the Enclave installer into an existing package.
Note
The MSI package does not bundle the Visual C++ Redistributable, so you will need to ensure that your packaging and deployment steps include the VC++ redistributable library as well; See this Microsoft document for further details, and links to download the redistributable.
-
Download the latest Windows MSI installer.
Package checksum (loading ...)
----------------------------------------------------------------Package version
xxxx.xx.xx.xxxx (Direct Download)
-
Install the MSI using
msiexec:msiexec /i enclave-setup-unattended-arm64-<version>.msi /quiet ENROLMENT_KEY=XXXXX-XXXXX-XXXXX-XXXXX-XXXXXNote
If your tooling provides an enrolment key to the installer, at the time of installation the target system will require an Internet connection to perform the enrolment.
If you need to deploy Enclave to a system without an Internet connection, use the unattended installer without the
ENROLMENT_KEYproperty, then use theenclave enrolCLI command to enrol the system when an Internet connection becomes available.
Updating
To update an unattended installation, if you used our PowerShell script to deploy, just re-run the same script.
If you used one of the distribution packages directly, distribute the new version of the unattended installer via the same method as you used when deploying originally; existing enrolled systems will have their configuration and identity preserved during the upgrade. Enclave will stop and then restart with the new version automatically during the update.
Uninstalling
Removing Enclave from a system (when Enclave was installed via unattended mode) can either be done by normal Windows uninstall mechanisms (i.e. via Apps & features), or by running one of the installer packages, or by running msiexec with the Enclave product code.
If you installed Enclave using an MSI, or the PowerShell script, you can use the installer product code to remove Enclave.
-
Find the Enclave product code:
C:\> wmic product get name,identifyingnumber | findstr Enclave {5A12994F-7EF0-4E39-B21A-BE91EA083179} Enclave Agent -
Remove Enclave using the product code:
C:\> msiexec /x "{5A12994F-7EF0-4E39-B21A-BE91EA083179}" /quiet /norestart
If you installed Enclave using an MSI, or the PowerShell script, you can use the original MSI file to remove Enclave.
-
Find the version of Enclave installed:
C:\> enclave version -
Installations managed by the unattended PowerShell script place the MSI file into the
%TEMPdirectory of the executing user context. Find (or download) the MSI used to install Enclave:C:\> dir %TEMP%\enclave-*.msi -
Remove Enclave:
C:\> msiexec /x enclave-2024.7.13.1611.msi /quiet /norestart
If you installed Enclave using the EXE installer package, you can use the original EXE file to remove Enclave.
-
Find the version of Enclave installed and obtain the corresponding unattended
exeinstaller package:C:\> enclave version -
Remove Enclave:
C:\> enclave-setup-unattended-x64-2024.7.13.1611.exe -uninstall -quiet
Troubleshooting
What to do if install fails
If an installation doesn't work as expected, examine the log files at C:\Program Files\Enclave Networks\Enclave\Agent\logs. If an install is interrupted, use the Enclave setup file to restart the process.
Important
On Windows Server 2012 R2 the Windows Management Framework 5.1 update is required before installing Enclave.
If you're performing an unattended installation with an MSI file and need to generate detailed install logs, you can manually run the MSI using msiexec and specific the /l*v option to enable verbose logging. Don't forget to use the correct enrolment key.
msiexec /i enclave-setup-unattended-x64-latest.msi /quiet ENROLMENT_KEY=XXXXX-XXXXX-XXXXX-XXXXX-XXXXX /l*v install.log
For general troubleshooting and errors, visit our troubleshooting page to find common issues.
If installation fails and you are unable to resolve the problem, please contact support@enclave.io or get help in our community support channels.
Last updated April 25, 2025