How to securely access your Synology NAS drive with Enclave
Note
If you already have Enclave running on your Synology NAS drive and need to update Enclave to the latest version, please visit our how to update Enclave on your Synology NAS drive tutorial.
Synology are market leaders in network attached storage devices, perfect for home or small business use. Enclave helps you easily build safe, secure and private network connectivity without the hassle of configuring firewalls and VPNs, or needing to manage IP addresses, subnets, ACLs, NAT, routing tables, certificates and secret keys.
In this article we will show you how to easily provide private remote access to your Synology NAS drive without needing to open ports or setup a VPN server, darkening your network to third parties by installing Enclave.
Before you begin, you will need:
- An Enclave account (Register here, for free)
- A Synology NAS drive running at least DSM 7.0
- Administrative access to your Synology NAS drive
When setup, Enclave will be running inside a Docker container on your Synology NAS drive. At the time of writing, Docker can only be installed on devices from the Synology Plus Series product line (not the Value Series) so please check to see if your system is a supported model.
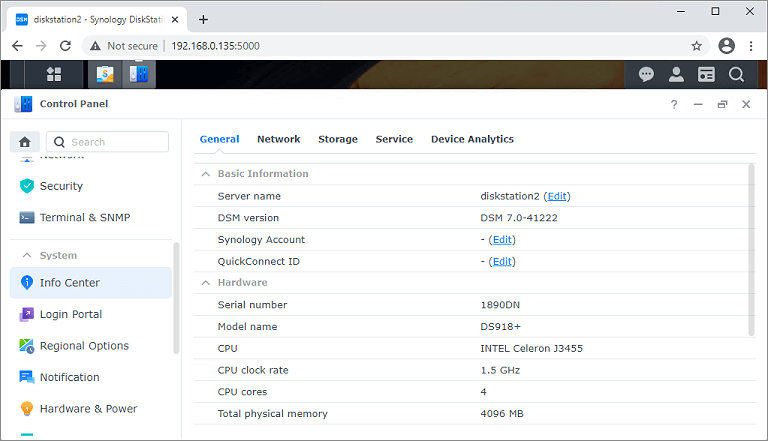
The Synology NAS allows administrators to fully own their devices, enabling SSH and dropping into a root bash prompt on the DSM software, Synology's Linux-based operating system.
Okay, lets get started.
Warning
If you have opened administrative access ports on your Synology NAS drive to the public Internet (default ports are 5000, 5001 and 22 for SSH) you should re-consider if they really need to be open, and close those ports if not. They are the default HTTP and HTTPS web server ports for Synology DSM and allow access to the administration console.
1. Enable SSH access
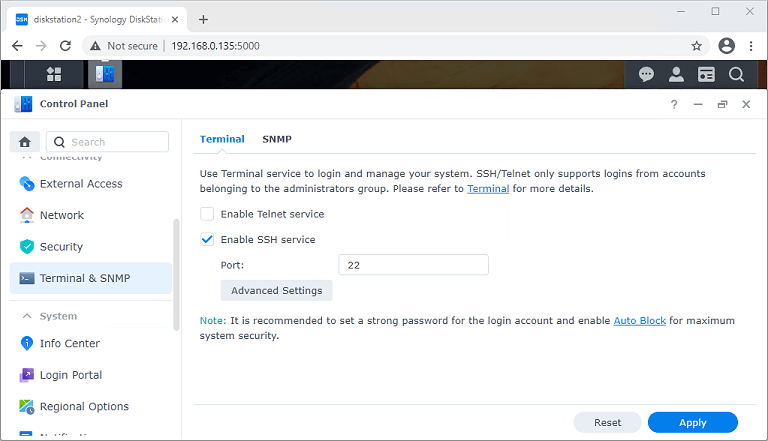
First, you'll need to enable SSH access to your Synology NAS drive. For Enclave to create a virtual network interface, we'll need to ensure that the tun kernel module is installed and enabled on the device. We do this by enabling and connecting into the device via SSH. Open the Control Panel, navigate to Terminal & SNMP and enable the SSH service.
2. Install the TUN kernel module
With SSH enabled, log into your NAS using the admin account and check to see if the tun kernel module is installed and enabled.
lsmod | grep -w tun
If lsmod returns no results, you'll need to use insmod to install it. Enclave depends on the TUN module to be successfully loaded, as it allows the Linux kernel to create virtual network interfaces.
sudo insmod /lib/modules/tun.ko
Now check lsmod again, you should see tun module is now loaded:
tun 19133 0

Modules manually loaded using insmod do not persist when your system is rebooted. Using insmod confirmed we could enable the TUN driver, but was not a permanent change. The module will be unloaded the next time the Synology NAS reboots, so we'll create a script and schedule it to run on start-up which will re-install tun.ko at boot.
-
Switch to root
$ sudo su - -
Create the following script on your Synology file system by typing
vim /volume1/enable-tun.sh#!/bin/sh if ( [ ! -c /dev/net/tun ] ); then if ( [ ! -d /dev/net ] ); then mkdir -m 755 /dev/net fi mknod /dev/net/tun c 10 200 fi if ( !(lsmod | grep -q "^tun\s") ); then insmod /lib/modules/tun.ko fi -
Save the file by pressing the
[ESC]key, followed then by typing:wq!(w for write, and q! for quit) -
Mark the script as executable
chmod +x /volume1/enable-tun.sh -
Lastly, you'll need to login to the Synology Web Interface and create a scheduled task to run this script on start-up:
a. Go to Control Panel > Task Scheduler and create a new
User-defined scriptas aTriggered Task.b. Name the task
Enable TUN, set the user to berootand the event asBoot-up.c. Then, in the
Task Settingstab enterbash /volume1/enable-tun.shas the User-defined script and hit OK.d. To test if the script works after restarting your device, log back into SSH and run
lsmod | grep -w tunto check that the TUN module was successfully re-loaded.
Info
For this tutorial, you won't need SSH access any more, if you're not going to use it again please go back and disable the SSH service in the DSM Control Panel.
3. Install Docker
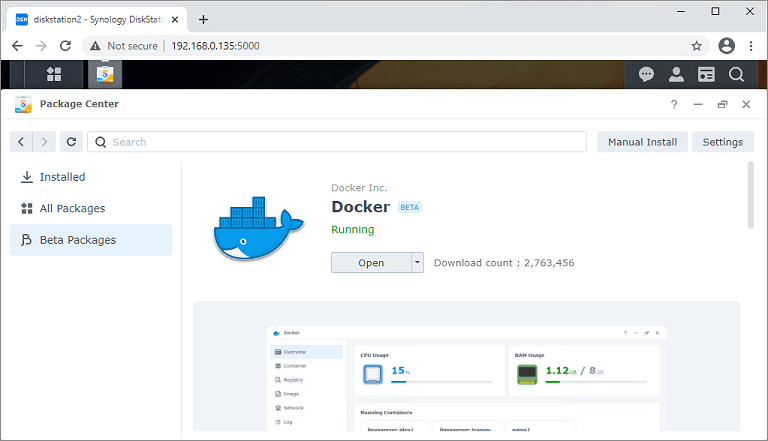
The easiest way to install Docker on your Synology NAS drive is via the DSM package manager. Navigate to the Package Center and install either the Synology Docker package if your device is running DSM 6.2+``, or the Synology package [Container Manager](https://www.synology.com/en-uk/dsm/packages/ContainerManager?os_ver=7.2) if the device is onD`SM 7.2+`` or later.
4. Download Enclave
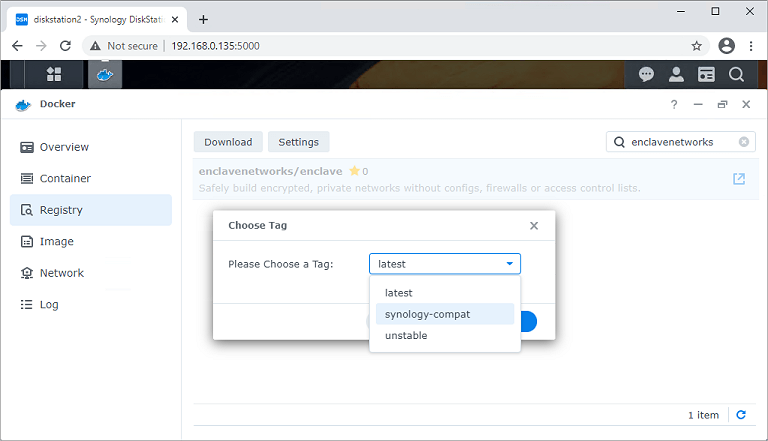
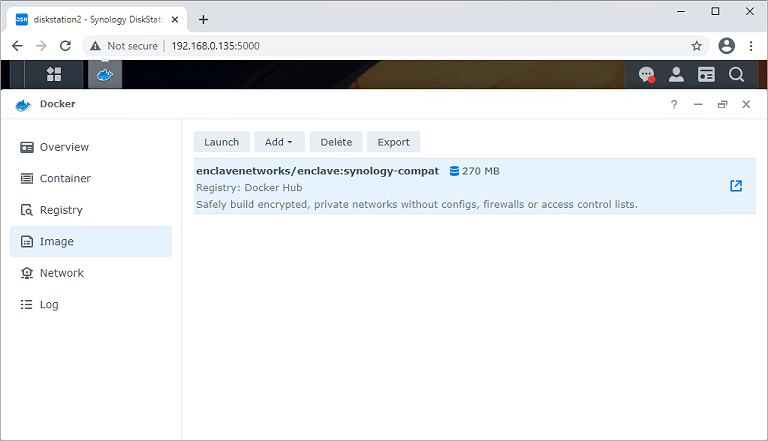
Using the search box on the Registry tab of the Docker package, search for enclave and download the enclavenetworks/enclave image from the container registry. The Enclave Docker image hosted on Docker hub. As you're prompted to choose a tag, select synology-compat to ensure you're running the latest version of Enclave compatible with Synology Devices.
5. Launch an Enclave container
Once the Enclave image is downloaded, the Launch button (shown below) in the Image tab will become available, click this.
Now we are ready to setup the Enclave container. First, give the container a name, we've used enclave. Also need to be sure to check Execute container using high privilege, this causes DSM to pass the --privileged argument to Docker, which allows the container to request --cap-add NET_ADMIN (perform various network-related operations) and --device /dev/net/tun (allows virtual network devices to run inside the container).
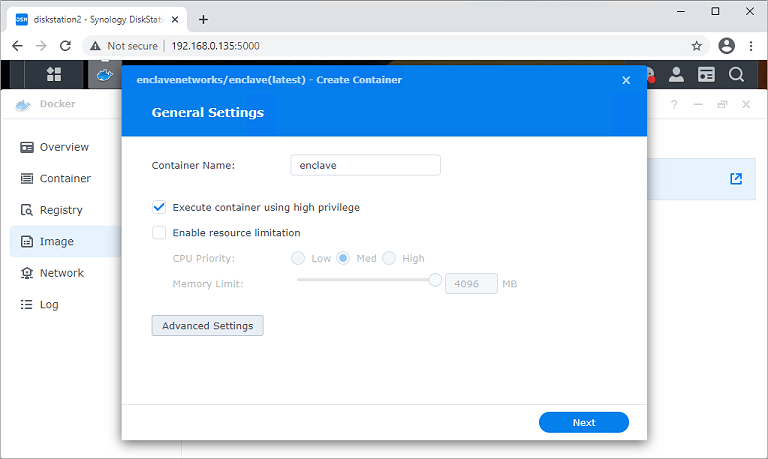
Before clicking Next, open the Advanced Settings dialog.
-
Under the
Advanced Settingstab -
Select
Enable auto-restart -
Under the
Volumetab -
Select
Add Folder. Create a mount path to/etc/enclave/profilesin thedockerdirectory on your DiskStation. This is where Enclave will write its configuration file, private keys, and certificates to persist between reboots.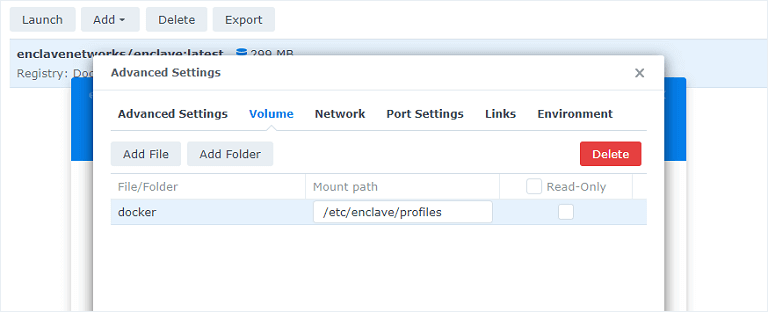
-
Under the
Networktab -
Select the checkbox to
Use the same network as Docker host. This will allow you to access the Synology NAS drive via the Enclave network. -
Under the
Environmenttab -
Define a new Environment Variable called
ENCLAVE_ENROLMENT_KEYand set its value to a valid (and enabled) enrolment key from your Enclave account. Be careful not to include whitespace!
This Enrolment key is only used the first time Enclave runs. When Enclave has successfully started once and written a profile to disk, it is safe to remove this environment variable.
-
Leave the
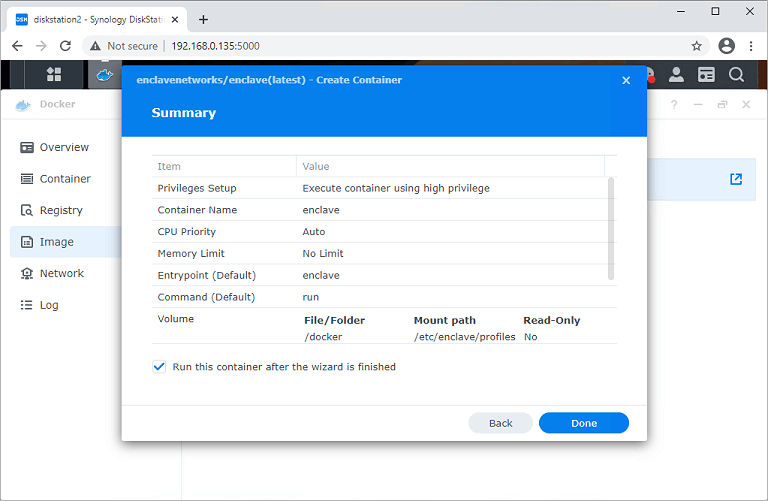
Execution Commandset to the default value ofrunand click Apply.
Info
Enrolment keys are available from the Enclave Portal and determine which systems can register to your Enclave account, so we recommend that you keep them secret.
Congratulations! You've finished configuring your Enclave container, click Done to Launch.
6. Connect with Enclave
Your Enclave container is starting up and will enrol to your account, within 1 or 2 seconds your Enclave container will be happily humming away in the background. Let's create a connection to another system running Enclave.
From the Docker package, go to the Container tab, select the Enclave container you've just created and open the container Details pane. Here you can see CPU usage, RAM usage, container uptime and other information.
Move to the Terminal tab and click on the Create button to drop into a bash shell inside the container, from here you can work with and manipulate Enclave as normal using the CLI.
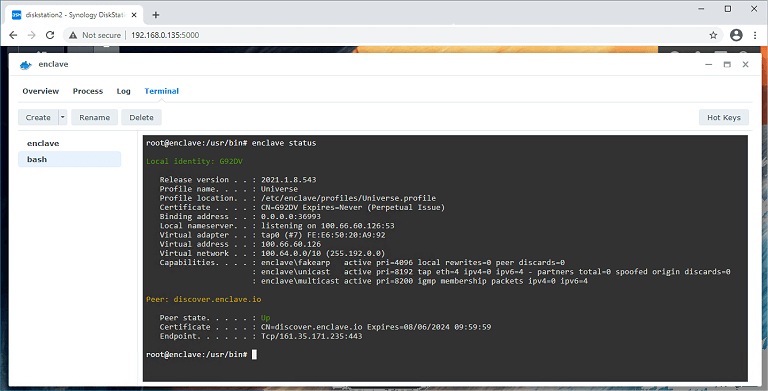
First, use the status verb to check on the Enclave process and view your container's Local Identity. The container will also be visible as a newly connected system in the Enclave Portal.
# enclave status
Now you know the Local Identity of your container, you can authorise other systems to talk to your container.
Once you've define a policy and established access to the Synology NAS Drive, why not try using Enclave's DNS feature to reach your Synology device using a friendly name like diskstation.enclave.
Welcome to your own personal, dark private storage network!
7. Enable automatic updates
We recommend familiarising yourself with our How to update Enclave on your Synology NAS drive guide, and configure automatic updates to the Enclave base image where possible.
Supported Models
This tutorial requires Docker to be installed on your Synology NAS drive which, at the time of writing, only runs on Synology NAS drives from the Plus Series product line (not the Value Series). Please see the Synology Docker (DSM 6.2) or Container Manager (DSM 7.2) package for an up to date list of supported models.
DSM 7.2 (Container Manager package
| Series | Supported Models |
|---|---|
| FS series | FS6400, FS3600, FS3410, FS3400, FS3017, FS2500, FS2017, FS1018 |
| HS series | HD6500 |
| SA series | SA6400, SA3610, SA3600, SA3410, SA3400D, SA3400, SA3200D |
| 24 series | DS224+, DS124 |
| 23 series | RS2423RP+, RS2423+, DS1823xs+, DS923+, DS723+, DS423+, DS423, DS223, DS223j |
| 22 series | RS822RP+, RS822+, RS422+, DS3622xs+, DS2422+, DS1522+, DVA1622 |
| 21 series | RS4021xs+, RS3621xs+, RS3621RPxs, RS2821RP+, RS2421RP+, RS2421+, RS1221RP+, RS1221+, DS1821+, DS1621xs+, DS1621+, DVA3221 |
| 20 series | RS820RP+, RS820+, DS1520+, DS920+, DS720+, DS620slim, DS420+, DS420j, DS220+, DS220j, DS120j |
| 19 series | RS1619xs+, RS1219+, DS2419+II, DS2419+, DS1819+, DS1019+, DVA3219 |
| 18 series | RS3618xs, RS2818RP+, RS2418RP+, RS2418+, RS818RP+, RS818+, DS3018xs, DS1618+, DS918+, DS718+, DS218+ |
| 17 series | RS18017xs+, RS4017xs+, RS3617xs+, RS3617RPxs, RS3617xs, DS3617xsII, DS3617xs, DS1817+, DS1517+ |
| 16 series | RS18016xs+, RS2416RP+, RS2416+, DS916+, DS716+II, DS716+, DS216+II, DS216+ |
DSM 6.2 (Docker package)
| Series | Supported Models |
|---|---|
| FS series | FS6400, FS3600, FS3400, FS3017, FS2017, FS1018 |
| SA series | SA3600, SA3400, SA3200D |
| 21 series | RS4021xs+, RS3621xs+, RS3621RPxs, RS2821RP+, RS2421RP+, RS2421+, RS1221RP+, RS1221+, DS1821+, DS1621xs+, DS1621+, DVA3221 |
| 20 series | RS820RP+, RS820+, DS1520+, DS920+, DS720+, DS620slim, DS420+, DS220+ |
| 19 series | RS1619xs+, RS1219+, DS2419+II, DS2419+, DS1819+, DS1019+, DVA3219 |
| 18 series | RS3618xs, RS2818RP+, RS2418RP+, RS2418+, RS818RP+, RS818+, DS3018xs, DS1618+, DS918+, DS718+, DS218+ |
| 17 series | RS18017xs+, RS4017xs+, RS3617xs+, RS3617RPxs, RS3617xs, DS3617xsII, DS3617xs, DS1817+, DS1517+ |
| 16 series | RS18016xs+, RS2416RP+, RS2416+, DS916+, DS716+II, DS716+, DS216+II, DS216+ |
| 15 series | RS815RP+, RS815+, RC18015xs+, DS3615xs, DS2415+, DS1815+, DS1515+, DS415+ |
| 14 series | RS3614xs+, RS3614RPxs, RS3614xs, RS2414RP+, RS2414+, RS814RP+, RS814+ |
| 13 series | RS10613xs+, RS3413xs+, DS2413+, DS1813+, DS1513+, DS713+ |
| 12 series | RS3412RPxs, RS3412xs, RS2212RP+, RS2212+, RS812RP+, RS812+, DS3612xs, DS1812+, DS1512+, DS712+, DS412+ |
| 11 series | RS3411RPxs, RS3411xs, RS2211RP+, RS2211+, DS3611xs, DS2411+, DS1511+, DS411+II, DS411+ |
Having problems? Contact us at support@enclave.io or get help and advice in our community support channels.
Last updated December 20, 2023