Enrolment Keys
In order to connect to a device over Enclave, it must first be enrolled in your Organisation. This is achieved using Enrolment Keys, plain-text character strings similar to a password, which belong to your Organisation and are distributed to users.
Enrolment Keys can be imbued with a variety of different properties, including the ability to automatically apply Tags to Systems, making them a powerful tool for reducing administrative overhead.
Creating Enrolment Keys
Log into the Enclave Portal and open the Enrolment Keys page. Click Create Enrolment Key at the top right-hand side of the page.
In the pane that opens, add a name. We recommend something simple, which clarifies the key's purpose. For example, UK Developers, if the key applies the developers and UK Tags to Systems.
Define the key properties as outlined below.
Production use
This guide uses a Quick Start Key which was automatically created when you first registered for an account. This key is limited to 5 enrolments by default. You may increase this limit, but it exists to encourage you to define Enrolment Keys and Tags that match your connectivity requirements in production. Visit the Enrolment Keys section to learn more about creating and managing Enrolment Keys.
Security
Enrolment keys should be treated as secrets as they control access to your tenant; handle, share and store your Enrolment Keys as you would any other organisational secret.
Enrolment Key properties
Type
Keys can be one of two types: General Purpose or Ephemeral, depending on the type of device they enrol.
General Purpose
General Purpose Enrolment Keys are suitable for enrolling workstations, laptops, servers and other Systems that are relatively long-lived or manually provisioned.
Systems enrolled using these keys remain in your Enclave Organisation if they stop running.
General purpose keys have two type-specific properties:
Approval Mode
By default, once a user has enrolled, their system must be approved in the Enclave Portal before connectivity to their device can be established. This is known as Gated mode, which introduces the opportunity to manually verify enrolled Systems.
This step isn't always required. For example, if you have Trust Requirements in place on the Policy to verify the user's identity. In this case, you can instead choose to automatically approve enrolled Systems by selecting the Automatic approval mode.
Use Limit
Often, you'll know exactly how many people need to be enrolled. In these cases, you can set a use limit to automatically disable the key once the quota has been reached. This can help prevent the key from being circulated once all intended users have enrolled.
Production use
Use limits can be increased once they've been hit.
Ephemeral
Ephemeral Enrolment Keys are used for enrolling containers, Kubernetes pods and other Systems that are temporary, short-lived or automatically provisioned.
Systems enrolled using these keys are automatically removed from your Enclave Organisation when they stop/disconnect.
You can't change the approval mode for Ephemeral Enrolment Keys, nor can you set a use limit, as you can for General Purpose Enrolment Keys. Ephemeral Enrolment Keys are designed for repeated and automatic provisioning, so systems are automatically approved, and there is no limit on how many can be enrolled.
Disconnect Timeout
Systems that disconnect unexpectedly are given a grace period before removal, during which time reconnection will prevent removal. This allows you to recover from an unplanned outage (e.g. due to loss of internet connection) with minimal disruption.
By default, this grace period lasts for 30 minutes, but it can be extended to up to a month, or reduced to as little as a minute.
Warning
Graceful shutdowns always causes immediate removal.
Auto Tags
Enrolment Keys can apply Tags to Systems automatically upon enrolment. This is a great time-saving capability; rather than having to manually apply Tags to every enrolled system, you can simply provide users with the correct key.
For example, you may have defined the following Policy, which provides developers with access to Kubernetes:
| Policy Name | Sender Tags | Receiver Tags |
|---|---|---|
| Kubernetes access | developers | kubernetes-pods |
By adding the developers Auto Tag to the key, all Systems enrolled using the key will immediately have the developers Tag applied, giving them instant access to Kubernetes. New members of the development team can therefore hit the ground running, without any administrative intervention.
Auto Expiry
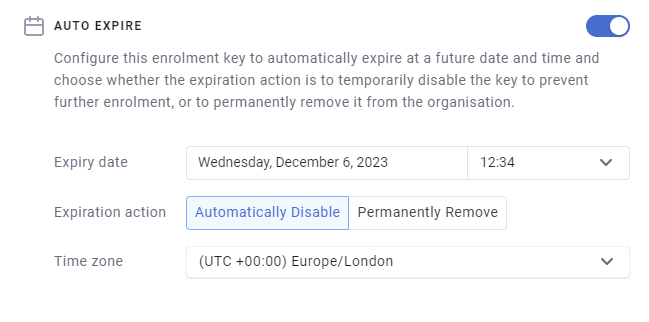
Some keys aren't meant to be used forever. They may be used to enrol some on-site visitors for a one-off demonstration, or to test some new functionality prior to launch. In these cases, you can opt to select a date and time at which the key will automatically expire.
Upon expiration, one of two things can happen. Either the key is permanently removed or it's temporarily disabled. Disabled keys can be re-enabled from the Enrolment Keys page.
By setting expiry dates, you can remove the overhead of having to remember to delete keys.

IP Address Constraints
You can further restrict the use of Enrolment Keys to specific network locations using IP Address Constraints. For example, you may want to ensure that the only people who can use a key are those who are on-site.
Managing Enrolment Keys
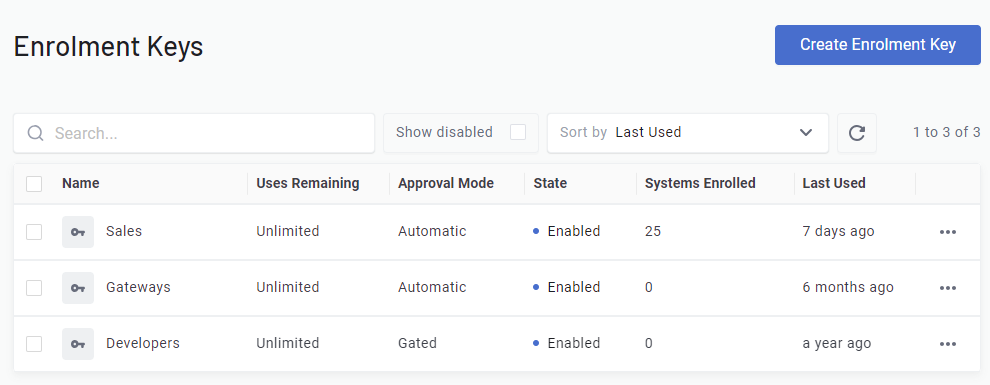
Keys can be managed from the Enrolment Keys page. Here, you'll find a searchable list of all your key.

In addition to creating keys, you can also take the following actions by clicking the three dots next to each key:
Disable
Disabled keys can't be used to enrol systems. In order to use them again, they must first be re-enabled.
Delete
Deleted keys, like disabled keys, can't be used to enrol systems. However, deleted keys can never be used again.
Edit
Once a key's been created, you can still modify its properties. The only exception to this is the type of the key, which can never be changed (an Ephemeral key can never become a General Purpose key, for example).
Duplicate
Sometimes, you may want to create a key which is very similar (or identical) to a key you've already created. Duplicating a key allows you to do so quickly and efficiently.
Using Enrolment Keys
To use an Enrolment Key, you'll need to find its associated character string:
- Navigate to Enrolment Keys page.
- Find the key you'd like to use and select it from the table.
- In the pane that opens, Click
View Key(next to the key type). - Copy the displayed string from the pop-up window.
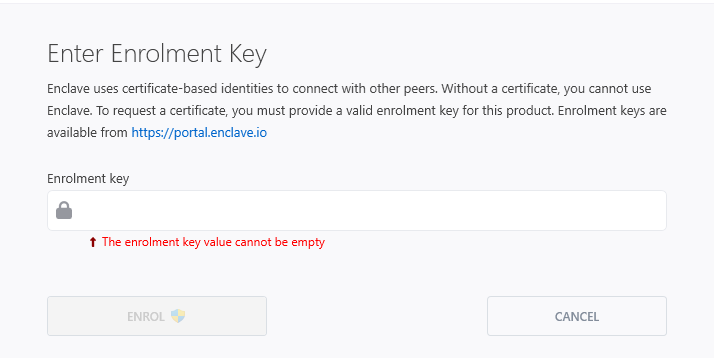
To enrol, either enter this string into the Enclave desktop app:

Or from the terminal, by running the enclave enrol command and entering the string when prompted.
Elevated privileges
Enrolling requires elevated privileges. On Mac and Linux, pre-fix the command with sudo. On Windows, make sure you open the terminal as administrator.